DIY Scarab Beetle - 3D Papercraft: A Creative Project with a Few Important Tips
Creating a DIY Scarab Beetle - 3D Papercraft is an excellent way to blend artistry with craftsmanship. This intricate paper model, when assembled correctly, transforms into a stunning three-dimensional representation of the ancient and symbolic scarab beetle. Whether you're a hobbyist looking for a fun weekend project or a professional wanting to add a unique touch to your work, this papercraft offers both creative satisfaction and visual appeal.
What Exactly Is DIY Scarab Beetle - 3D Papercraft?
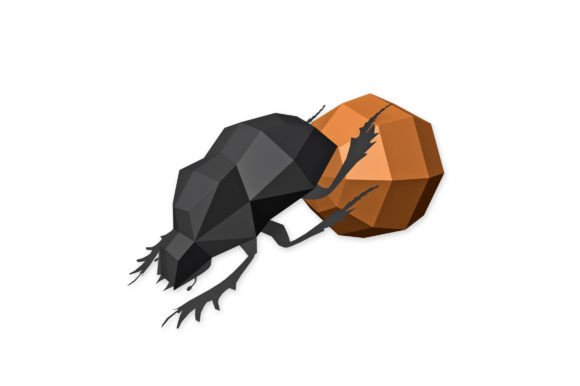
A DIY Scarab Beetle - 3D Papercraft typically includes digital design files such as PDF, EPS, DXF, and PNG formats. These files serve as templates that you can print on cardstock paper and assemble by hand using basic tools like scissors, a craft knife, glue, and a scorer or bone folder. The finished model usually takes about two hours to complete and stands approximately 15 x 17 x 30 CMS in size—making it ideal for display, gifts, or educational use.
The project appeals to a wide audience, including educators who want to teach geometry or history, marketers creating branded merchandise, bloggers showcasing hands-on content, and even small business owners offering custom paper crafts as products. Its accessibility and aesthetic value make it a popular choice for those interested in desktop modeling or decorative arts.
Common Mistakes and Misunderstandings
While the idea of assembling a 3D papercraft may seem straightforward, many people overlook key details that can impact the final result. Here are some common pitfalls and how to avoid them:
1. Skipping the Quality Check of Digital Files
One of the most frequent errors occurs before printing. Some users download the digital files without verifying their quality or completeness. If the PDFs or other formats are blurry, misaligned, or missing pieces, the entire project becomes frustrating and time-consuming to correct.
Better Approach: Always preview the digital files after downloading. Open the PDF in a viewer that supports zooming and check for any visible flaws. Ensure all parts are included and clearly marked. For professionals or entrepreneurs planning to produce multiple units, double-check file resolution and scalability (especially with EPS and DXF formats) to maintain consistency across batches.
2. Using the Wrong Type of Paper
Papercraft requires sturdy yet flexible material. Many beginners opt for regular printer paper instead of the recommended A4 letter cardstock. This can lead to weak structures, difficulty in scoring, and poor durability once assembled.
Correct Choice: Use high-quality cardstock paper between 160–220 gsm. This thickness ensures the model holds its shape while still being easy to cut and fold. Avoid glossy or coated papers unless specified in the instructions, as they may resist adhesion from standard glue types.
3. Rushing Through the Scoring Process
Scoring is essential for clean, precise folds. However, some crafters skip this step or do it carelessly, resulting in uneven edges and a less professional finish.
Pro Tip: Use a non-working ballpoint pen or a dedicated scorer to mark fold lines before cutting. Apply gentle pressure along each line to create a guide. Once scored, folding becomes effortless and significantly improves the overall look of the model.
4. Ignoring the Recommended Tools
Though it's tempting to use whatever tools are handy, doing so can compromise the outcome. For example, using regular scissors for detailed cuts might cause jagged edges, and applying glue incorrectly can lead to misalignment or warping.
What to Do Instead: Invest in a good pair of precision scissors and a sharp craft knife for intricate parts. Use a ruler to align components during assembly and apply glue only where needed. Over-gluing can cause unnecessary bulk or tear delicate sections.
5. Underestimating the Time Required
Two hours sounds manageable, but this is often under the assumption that everything goes smoothly. Beginners especially might not account for learning curves, re-cutting mistakes, or additional setup time.
Realistic Planning: Set aside at least three hours if you're new to papercraft. This allows room for error and gives you the mental space to focus on the process rather than rushing through it. Break the project into smaller steps and take breaks as needed to avoid fatigue-related mistakes.
Choosing the Right Scarab Beetle Design
When selecting a DIY Scarab Beetle - 3D Papercraft, consider the complexity level and the intended purpose. Some models are designed for quick assembly, while others offer more detail and realism. For example, if you're making one for a classroom demonstration, a simpler version might be better. But if you’re aiming for a museum-style display or a gift for someone who appreciates fine craftsmanship, choose a design with more depth and texture.
Tip: Look for designs that include clear instructions and labeled parts. Some creators provide video tutorials or step-by-step guides which can be invaluable, especially for first-time builders.
Practical Steps to Assemble Your Scarab Beetle
- Print Carefully: Print the template full-size on A4 cardstock. Make sure your printer settings are set to "actual size" to avoid scaling issues.
- Cut with Precision: Use a craft knife and a self-healing mat for accuracy. Follow the cutting lines closely and don’t rush—neatness matters.
- Score Before Folding: Mark all fold lines gently with a scoring tool or the back of a pen. Fold along these lines to create crisp edges.
- Glue Strategically: Apply glue only to the tabs or flaps as instructed. Let the adhesive dry slightly before pressing to avoid smearing.
- Assemble Step by Step: Start with the base structure and gradually build up the body, wings, and legs. Refer to the instructions frequently to stay on track.
Once completed, your Scarab Beetle will stand out as a beautiful piece of papercraft. It can be displayed on a desk, used as part of a themed decoration, or even incorporated into educational materials to illustrate entomology or cultural symbolism.
Before You Buy or Download: What to Check
- File Formats: Confirm that the package includes all necessary files (PDF, EPS, DXF, PNG). Different formats suit different uses—EPS is great for editing in vector software, while PNGs may be useful for digital presentations.
- Assembly Time Estimate: Two hours is a rough estimate. If you're purchasing for a group activity or a deadline-driven project, factor in extra time for preparation and cleanup.
- Tool Requirements: Review the list of tools provided. Having the right ones ready prevents delays and enhances the experience.
- Design Clarity: Read reviews or request samples to assess the clarity of the design. A well-structured template makes all the difference.
- Support Availability: Choose a seller or creator who offers customer support. Even the best instructions can sometimes leave questions, and timely help is crucial for success.
Why This Project Stands Out
Compared to other paper-based hobbies like origami or pop-up cards, a DIY Scarab Beetle offers a unique combination of historical significance and artistic challenge. The beetle has long been a symbol in various cultures, particularly in ancient Egypt, representing transformation and rebirth. Incorporating such a meaningful subject into your papercraft adds a layer of storytelling to your creation.
Additionally, the digital file formats allow for customization. Educators can annotate the model for lessons, designers can tweak colors or textures, and businesses can brand the beetle subtly for promotional purposes. This adaptability sets the project apart and opens up numerous possibilities beyond just building a static model.
Final Thoughts on Creating a Scarab Beetle Papercraft
Making a DIY Scarab Beetle - 3D Papercraft is a rewarding endeavor, but attention to detail is key. By avoiding common mistakes and following practical advice, you’ll ensure a smooth process and a polished final product. Remember, the goal isn't just to complete the model—it's to enjoy the journey of crafting something tangible and meaningful.
If you're considering this project for a class, a workshop, or simply personal enjoyment, take a moment to review the tools, materials, and digital assets you'll need. Doing so ahead of time can prevent wasted effort and enhance your satisfaction with the end result. And if you run into any challenges, don’t hesitate to reach out—most creators are happy to assist and share tips for a successful build.