Music Instruments 3D Paper Cut SVG: A Creative Guide for Crafters
Hello, crafters! If you're looking to add a touch of artistry and elegance to your DIY projects, the Music Instruments 3D Paper Cut SVG template is an excellent choice. This layered paper cut design features a stunning square layout with intricate details that come to life when assembled. Perfect for both beginners and seasoned artists, it offers a unique way to express your creativity while making something meaningful.
What Makes Music Instruments 3D Paper Cut SVG Special?
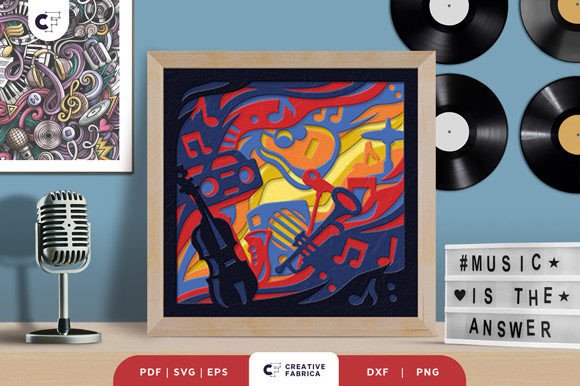
The Music Instruments 3D Paper Cut SVG is a digital template designed specifically for crafting three-dimensional shadow box decorations. It includes seven distinct layers that interlock seamlessly to form a lifelike representation of musical instruments in mid-air. The dimensions are precisely set at 20.32×20.32 cm, ensuring a compact yet impressive display once completed.
This design is compatible with various cutting tools such as Silhouette and Cricut machines, but don’t worry if you don't have one—traditional tools like an art knife and scissors work just as well. Whether you're into papercraft, home decor, or gift-making, this SVG file gives you flexibility and precision.
Common Mistakes When Using 3D Paper Cut Templates
Working with layered paper cuts can be tricky if you're not familiar with the process. Here are some common mistakes to avoid:
- Ignoring Layer Order: Each layer plays a role in the final structure. Misplacing them can ruin the illusion of depth and realism.
- Using the Wrong Paper Weight: The template is designed for Encore Cardstock 80 lb (216 gsm). Thinner or less rigid papers may tear or bend during assembly.
- Not Respecting Aspect Ratio: While you can resize the SVG file, maintaining the original aspect ratio is crucial to preserve the design’s proportions and visual appeal.
- Skipping Glue Instructions: Proper adhesion between layers ensures durability and stability. Avoid using excessive glue, which can warp the paper or leave visible smudges.
- Assuming the File Is Print-Only: Some users mistakenly assume they need to print before cutting, but SVG files can be used directly on most digital cutting machines.
How These Errors Can Impact Your Final Project
Making these errors might seem minor, but they can significantly affect your results. For example, incorrect layer placement could lead to a misaligned or lopsided model. Poor-quality paper may result in weak connections or tears, especially when assembling the delicate parts. Not following resizing guidelines can distort the design, making it look unprofessional or off-balance.
If you're creating a framed wall decoration or a light box with LED strips, any mistake in construction could compromise the lighting effect or structural integrity. This is where attention to detail truly matters. A well-assembled piece will stand out and impress others, while rushed or careless work may lead to frustration or wasted materials.
Practical Tips for Better Results
To ensure your project turns out beautifully, follow these best practices:
- Review the Layers Before Cutting: Take time to understand how each part fits together. Lay them out in order before starting the assembly process.
- Use High-Quality Cardstock: As mentioned earlier, Encore Cardstock 80 lb is recommended. You can find it in the 12×12 Cardstock Shop for optimal results.
- Test with a Smaller Version First: If you're new to 3D paper cuts, consider printing a smaller version to practice folding and gluing techniques.
- Work in a Well-Lit Area: Good lighting helps you see fine lines and make precise cuts, especially when working with intricate designs.
- Keep Tools Sharp: Dull blades can cause jagged edges or incomplete cuts, which are harder to assemble and detract from the finished product's quality.
Example: Framed Wall Art vs. Light Box
Let’s say you want to create a framed wall decoration. In this case, you'll need to carefully fold and glue each layer so that they align perfectly. However, if you're going for a light box effect by adding LED strips between the layers, you must ensure there’s enough space between each level to accommodate the lighting without compromising the structure.
A better approach is to plan your project type first. Decide whether you want a minimalist frame or a more dynamic light-up version. Once you’ve made that decision, adjust your materials accordingly—thicker cardstock for sturdiness or transparent sheets if you're experimenting with backlighting.
Understanding File Formats and Compatibility
The Music Instruments 3D Paper Cut SVG comes in multiple formats to suit different needs:
- SVG – Best for use with digital cutting machines like Silhouette and Cricut.
- PDF – Ideal for manual cutting with scissors or an X-Acto knife.
- EPS – Great for professional designers who use Adobe Illustrator.
- PNG – Useful for previewing the design or sharing it digitally.
- DXF – Compatible with laser cutters and other specialized tools.
One common misunderstanding is assuming all formats are interchangeable. While SVG is machine-specific, PDFs offer a printable blueprint. Make sure you select the right format based on your tools and experience level. Beginners often start with PDFs, while those with cutting machines benefit from SVGs for accuracy and ease of use.
Pro Tip: Always Check Machine Requirements
Before downloading, verify if your cutting machine supports SVG files. Some older models may require conversion or specific software. Also, ensure your software settings match the scale of the design to prevent oversizing or undersizing your pieces.
Choosing the Right Adhesive
Glue and double-sided tape are essential for holding the layers together. But not all adhesives are equal. Many people use regular craft glue, which can dry too quickly or become sticky under pressure.
Instead, opt for acid-free, repositionable glue sticks or tapes designed for papercraft. These allow you to make adjustments before the bond becomes permanent and help maintain the paper’s integrity over time. Applying adhesive only where needed also prevents unnecessary mess and keeps the design clean.
Realistic Scenario: Crafting for a Gift
Imagine you're making this as a gift for a music-loving friend. Rushing through the steps might lead to uneven folds or missing pieces. To avoid this, take your time and assemble each layer individually before securing them. This method makes it easier to spot issues early and correct them without redoing the entire project.
Also, remember that the final color might differ slightly from what you see online due to variations in lighting and paper stock. If color matching is important, consider ordering sample swatches or using white cardstock to let the design speak for itself.
When to Consider Alternative Uses
While the primary purpose of the Music Instruments 3D Paper Cut SVG is for wall art or light boxes, many crafters have found creative alternative uses. For instance:
- Adding it as a centerpiece for a music-themed party.
- Incorporating it into greeting cards for birthdays or holidays.
- Using it as a backdrop for photo shoots or social media content.
- Creating custom packaging for music-related products or gifts.
These applications open up opportunities for entrepreneurs and bloggers to monetize their creations or enhance their content visually. Just be sure to adapt the assembly method to fit the intended use—for example, using thinner cardstock for greeting cards or reinforcing the base for centerpieces.
Better Approach: Customize for Purpose
If you’re planning to use the design for marketing purposes, think about how lighting and presentation can elevate its impact. Adding subtle shadows or backlighting can make the design pop in photos or videos. Don’t hesitate to experiment with colors or textures to match your brand identity or event theme.
Before You Buy or Download
Here’s what to check before making a purchase or download:
- Does the template include clear instructions for assembly?
- Are the layers labeled and organized for easy identification?
- Is there a preview image or video showing the final product?
- Can you access support or customer service if you run into issues?
- Are there additional resources, like tutorial links or community forums?
These checks can save you time and money. A poorly organized template can be frustrating to use, especially if you're unfamiliar with the design. Clear labeling and helpful visuals make the process smoother and more enjoyable.
Final Thoughts on Making Smart Choices
The Music Instruments 3D Paper Cut SVG is a versatile and rewarding project for anyone passionate about crafting. By avoiding common pitfalls and understanding the nuances of the design, you can achieve professional-looking results with minimal effort.
Remember, patience and preparation go a long way. Whether you're creating a personalized gift, a statement wall hanging, or a promotional item, taking the time to learn and follow best practices will ensure your final piece reflects your care and creativity.
So grab your tools, choose the right materials, and enjoy the journey of bringing your 3D paper cut masterpiece to life. Happy crafting!